1. Read the Recipe (to the end!) before starting
Let’s get organized. Some people think studying a recipe is something amateurs do and it’s not necessary for them to double-check the recipe or follow things precisely. Make sure that you read the recipe to the end and understand all the steps before beginning. How many times have you glanced at a recipe, started it, read further down only to realize that you missed some very important steps? How frustrating is that? Moreover, make sure you have all the ingredients. Don’t convince yourself that substitutions will give you the same results. Get exactly what your recipe calls for.
Planning ahead and following a recipe closely with precision is essential to achieving consistently successful results.

2. Gather the Ingredients
The standard Dry and Wet ingredients you will need for most cake recipes are:
Flour: It is best to use cake flour. Not all types of flour are the same. That is why they gave them different names and numbers. All-purpose flour that most people have on hand can be used for cakes but it is better for bread and rolls. For cakes, you’ll be happier with more refined flour.

White Granulated Sugar: Standard granulated sugar is fine unless the recipe calls for something special.
Light Brown & Dark Brown Granulated or Refined Sugar: So many recipes call for these sugars. My pantry always has these two sugars ready to go.
Salt: Unless the recipe calls for something specific, basic
Corn starch: has many uses. You can use this in APF/all-purpose flour to make your own “cake flour”. Corn starch can be a separate ingredient in recipes and it is useful on silicone mats when rolling out fondant to help it not stick.

Baking Soda/sodium bicarbonate: This is a leavening agent used in recipes that calls for acidic ingredients such as cream of tartar, buttermilk or lemon juice.
Baking Powder: Is a complete leavening agent used in recipes. It has the base (sodium bicarbonate) and the acid-activated by liquid. *Baking powder and baking soda are not interchangeable so don’t try to substitute one for the other.
Cream of Tartar/potassium bitartrate: Is a dry powdery white leavening agent that helps stabilize egg whites to stand up tall and prevents sugar from crystallizing. Used for meringues, soufflés, or recipes with whipped eggs.

Powdered Sugar/Confectioners Sugar: If you are a baker you need lots of powder sugar for icings, frostings, fillings, buttercream, etc. Use a good brand and do yourself a favor….buy in bulk.
Light or Dark/Naturally Unsweetened Cocoa Powder: Buy high-quality cocoa powder to achieve the best baking results. Light cocoa powder is not expensive, standard in most recipes, and can be found in any grocery store. Dark Cocoa Powder is special, expensive, and not so easy to find. It is Dutch-Processed or Alkalized meaning it’s treated with an alkali to neutralize its acids. Because it is neutral it does NOT work with baking soda, only recipes with baking powder unless other acidic ingredients are used. Dutch-Processed Cocoa is delicate, mild-flavored, easily dissolved, and ideal for certain recipes.

Sugar Fondant/Sugar Paste: If you are using either for cake or cupcake decorating (and you are buying it) make sure you buy a top-quality brand!!, a brand you’ve worked with before, are sure of the taste and performance of that product. Like most ingredients, not all fondants or sugar pastes are made alike. There are some really bad brands out there that are a nightmare to work with. Some are too sticky, too dry, don’t taste good, etc. If you make your own, be prepared, practiced, and ready to “Roll” so to speak to prevent any disasters on bake day.

Marshmallows: this is an extra special item to have on hand but it’s specific to certain cookie recipes, fillings, frostings, and decorations. Always good to have during holiday baking and is needed for homemade fondant if you are adventurous and want to take a crack at it.
Chocolate/Candy Melts: Pretty much the same applies to chocolate as to the Sugar Fondant/Paste. Buy high quality, know the product, know which chocolate type and intensity works best with the recipe. Also, it’s important to be prepared and practiced in melting chocolate prior to cake baking day if the recipe calls for this. Melting chocolate and incorporating it into a recipe is tricky and you have to do it right so practice, practice, practice. Always check out others tips for how to melt chocolate to gain some insights and being to practice.
Graham crackers/cookies: always needed for pie or cake crusts and decorations.

Wet Ingredients
Real Butter/Salted & Unsalted/Softened or Cold: Depends what the recipe calls for but typically room temperature unsalted butter is needed. If you have brought your butter to room temperature then it’s already softened. Softened simply means that while it keeps its shape if you press on it you will leave an impression. Cold butter is not super hard but soft enough to cut into cubes without mashing apart. Do not substitute real butter for margarine or any other dietary kinds of butter. I cannot stress this enough. Just like flours, not all kinds of butter will give you the results you’re hoping for.

Butter or vegetable cooking spray: Nice to have when you need to grease pans before baking. Butter spray is best for baking because it tastes like butter, not vegetable oil.
M/L Eggs: Medium or Large eggs: Room temperature eggs are typically better for baking cakes because you’ll get lighter, fluffier, and moister cakes. The eggs mix more evenly in the batter vs cold eggs that separate. Don’t ignore this, you won’t regret it. This is my opinion but I don’t bother with small eggs, they’re just..too small. Only if the recipe calls for them which I have never seen yet. If the recipe doesn’t specify egg size use Medium. Medium is the standard size for baking but when the recipe calls for large eggs it’s best to use them. eh, hem…size kinda matters here otherwise the recipe wouldn’t have specified L.
Dairy Liquids: (milk, heavy cream, buttermilk, sour cream, yogurt, ricotta, mascarpone, etc): The dairy liquid varies from recipe to recipe so make sure you use the correct liquid/s. Also, as a rule, low-fat dairy isn’t ideal for getting super fluffy moist cakes. Not that it won’t taste good but it will alter things.

Vegetable or Canola Oil: Liquid oil that is vegetable fat. Canola oil helps cakes stay moist and rise to a lofty height. Stronger tasting oils such as olive, sesame, or walnut oil are not suitable for cakes.
Shortening: Fats and oils of animal or vegetable. Used in doughs and batters to give crisp or crumbly textures. Used when a recipe needs a flavorless fat thicker than oil but thinner than butter.
Vanilla extract/other extracts: Vanilla extract is most called for in bakers recipes. For flavor’s sake, use high quality-real vanilla extract, not the imitation stuff. If you want, you could replace some of the vanilla with another flavor extract like lemon or orange depending. If you are doing a specific flavored cake try using that flavor extract for maximum taste.

look and taste fantastic.
Gel or Liquid Food Coloring: Ideal for tinting, cakes, candy, frostings, icings, fondant, etc. Make sure you know which to use for which medium and how much for different types of baking/recipes. For baking, gel food coloring is better than liquid food coloring because it’s concentrated and you don’t need as much. You’re also not adding extra liquid if you don’t see the color you want. So since you don’t use as much gel vs liquid you have a better chance of not altering the taste of your cake or buttercream frosting.
Unsweetened Apple Sauce: This is always good to have on hand if you want to sub for another ingredient-recipe depending.
Bananas: Same goes as a sub for other ingredients-recipe depending.
Fresh Fruits: strawberry, lemons, apples, oranges, blueberries, raspberries, -always better than frozen (in cake batter) as the collected condensation from frozen fruits can add more liquid to the cake & negatively affect the outcome.

3. Pick Your Pans Wisely
The choice of size and style is simply a matter of preference or necessity. I strongly recommend a high-quality brand that is BPA, PFOA, & PTFE free for health and the easy release of all baked goods.
Check out: this cake pan guide for recommendations. There are several considerations when choosing the material of the pans itself.
These include: Glass pans keep an evenly divided, stable heat. However, they take longer to heat up and you will need to add extra bake time – up to 10 minutes – and keep an eye on the cake(s). Shiny metal pans also afford evenly-baked cakes and they heat up quickly making the bake time perfect for them. Dark metal pans heat up extremely quick and often don’t bake evenly. It may be necessary to lower the temperature of the oven by as much as 25 degrees from the recipe. Investing in quality bakeware ensures that you will receive deliciously consistent results with your baking.
Remember, non-stick and silicone is a baker’s best friend. Check out this post about our recommended bakeware sets.

4. Pan Prep and Care
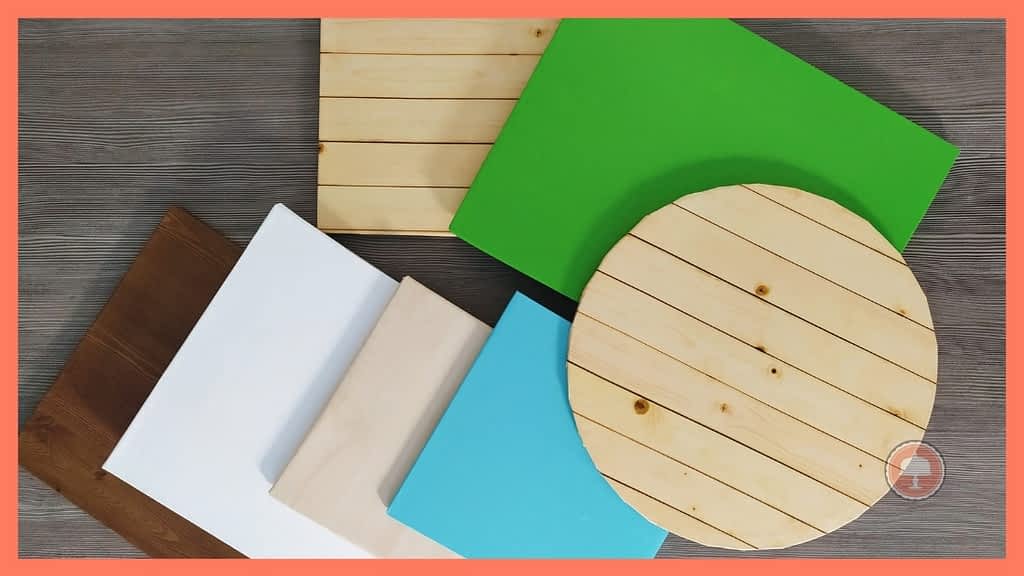
Now that you have chosen your pan/s, it is time to make sure that your cake does not stick. A stuck cake can ruin your whole plan. Always grease your pans and line them with parchment paper so your cakes will release easily after baking.
After baking hand wash all your baking pans and refrain from using anything that could scratch the non-stick coating.
Even non-stick pans need a little help.

5. Clean as you go & safe-keep your cookware
Clean as you go: in-between every free moment of baking. It’s an exhausting venture so maximize your tasks so you can put your feet up early. Most of your baking equipment cannot go in a dishwasher so you must wash by hand, dry, safety stack, and store away to prevent scratching or damage to your pans. This is really important. Avoid leaving pans in sinks unattended. So much of my cookware has been gauged by tossed silverware into the sink ruining my expensive baking pans while they soaked in soapy water. Quality cookware is not cheap so take care of it.

6. Stand Mixers versus Handheld Mixers
You need both…especially if you are or aspire to be a serious baker. If you are a hobby baker then a handheld mixer is fine it’s just limiting and more arm work. If you can afford a professional Stand Mixer it is highly suggested you get one. Invest in a large mixer if you need a bigger bowl situation. Baking prep in general will be a much more efficient experience all around. It is also advisable to have a Handheld Mixer. Small things or quick ingredients need mixing and all you need to do is wash the beaters. Also if anything happens to your big mixer you have the handheld ready to go.
Thanks for visiting and I hope this information has helped you to be more prepared next time you bake.
Please visit my Top 15 Baking Tips and Tricks

Thanks for visiting & Happy Baking!
Be sure to check out some of my other cake decorating and baking posts for new inspo


